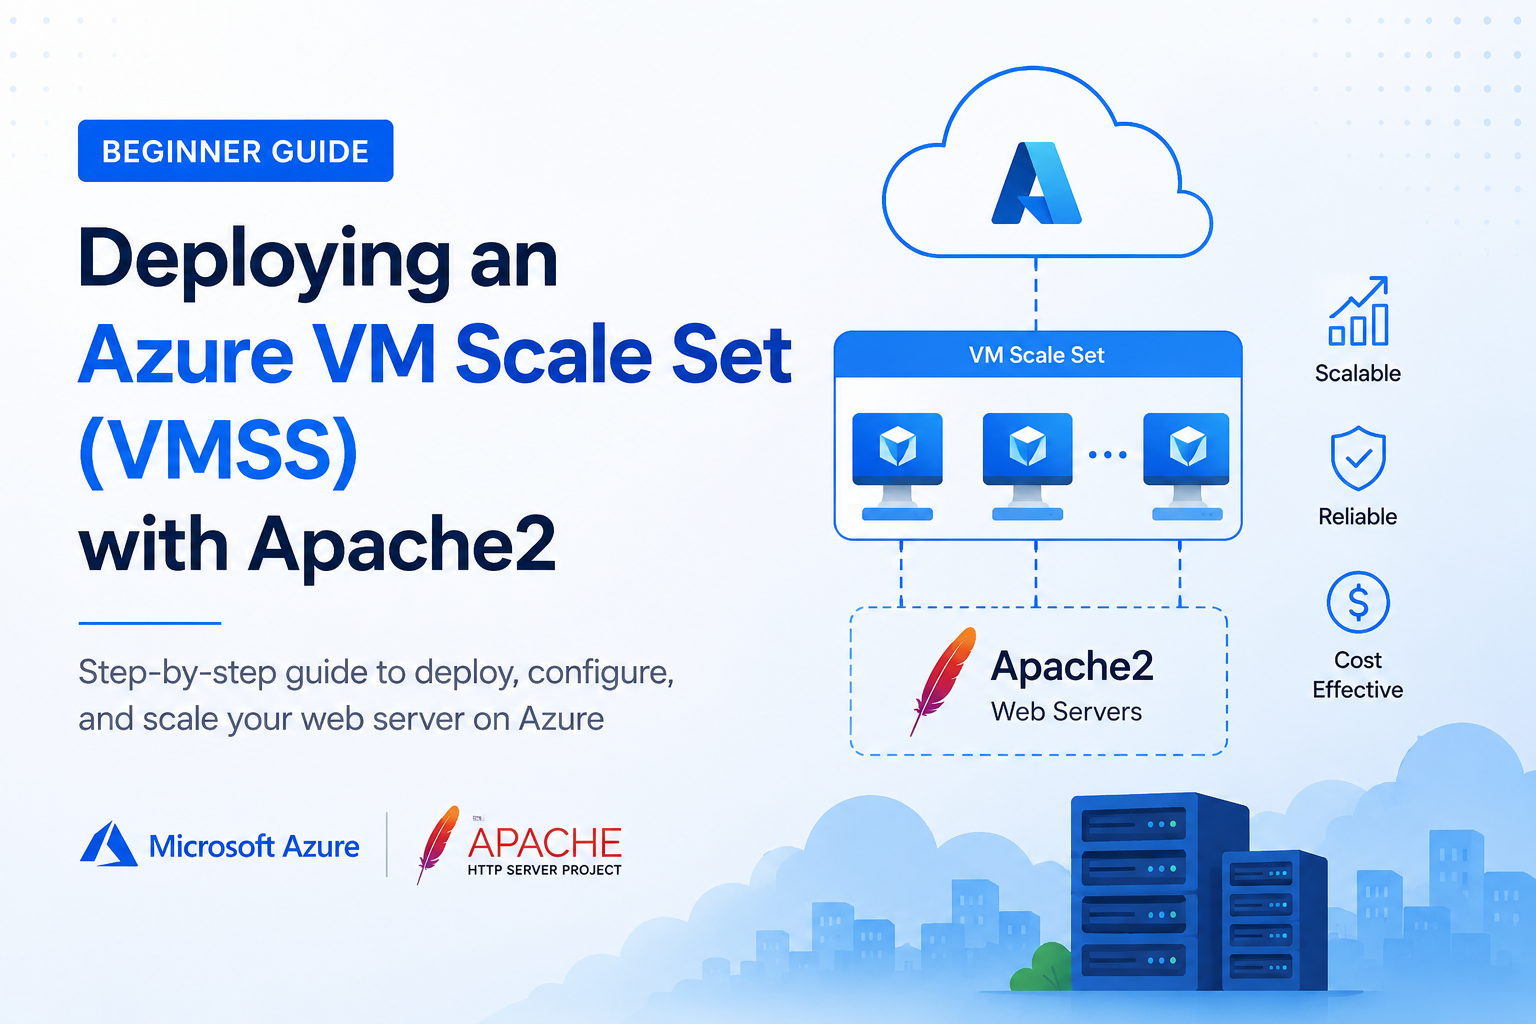
Beginner Guide: Deploying an Azure VM Scale Set (VMSS) with Apache2
In this guide, you will learn how to: Create an Azure Virtual Machine Scale Set (VMSS) Configure a Virtual Network and Load Balancer Automatically install Apache2 on all VM instances Enable HTTP traffic using a Network Security Group (NSG) Test load balancing across multiple virtual machines By the end of this setup, you will have a scalable web server environment running on Azure.
Step 1: Create a Resource Group
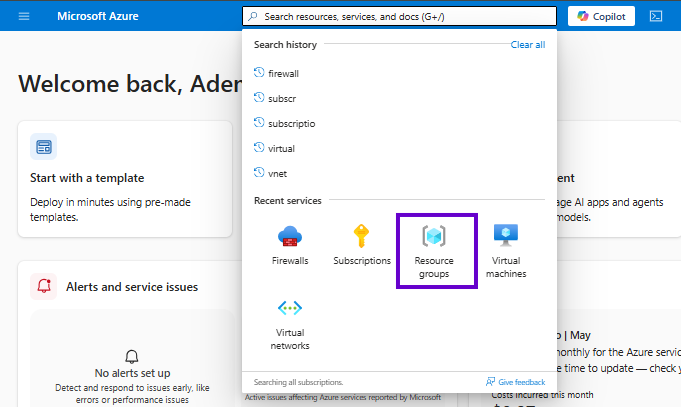
- Search for Resource Groups in the Azure Portal.
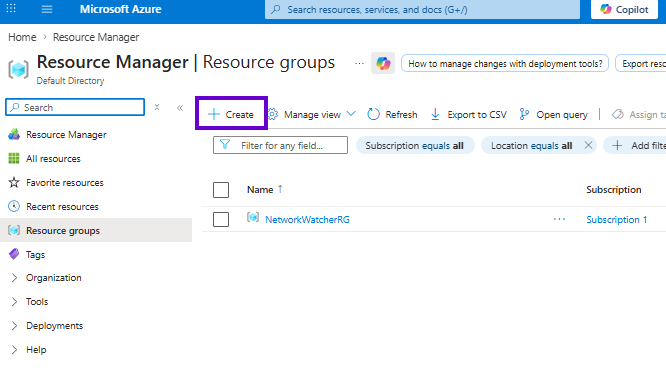
- Click Create.
Under the Basics tab:
Enter a Resource Group name
Select a Region
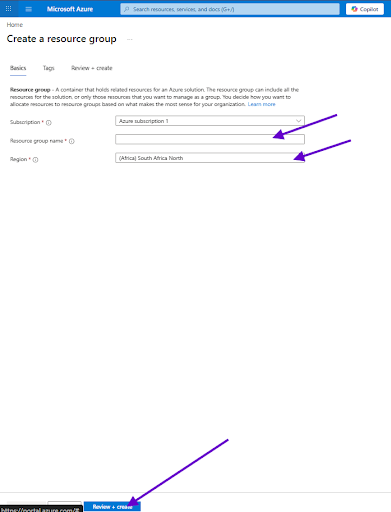
Click:
Review + Create
Create
Step 2: Create a Virtual Network (VNet)
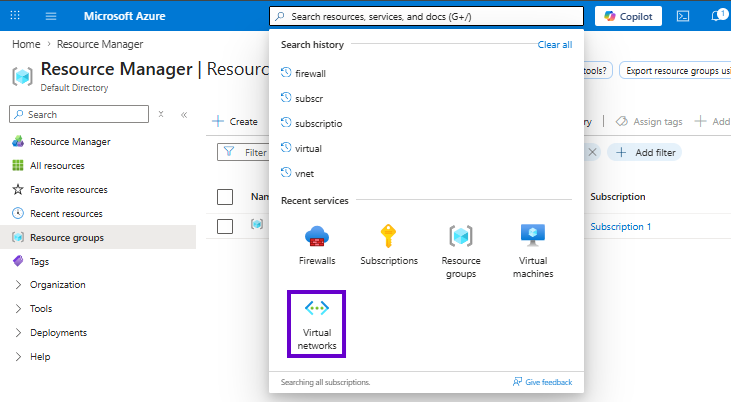
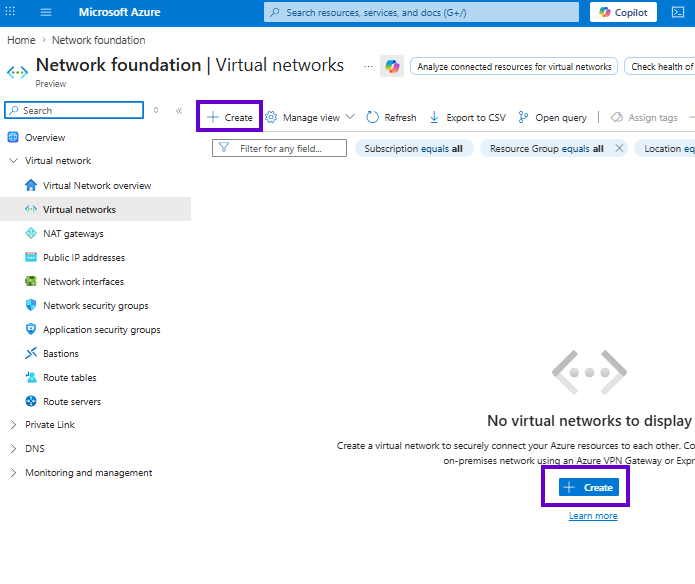
- Search for Virtual Network.
- Click Create.
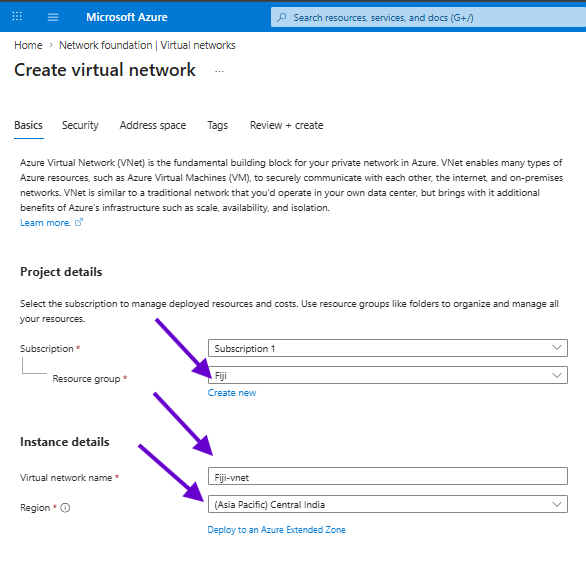
Under the Basics tab:
Select your Resource Group
Enter a VNet name
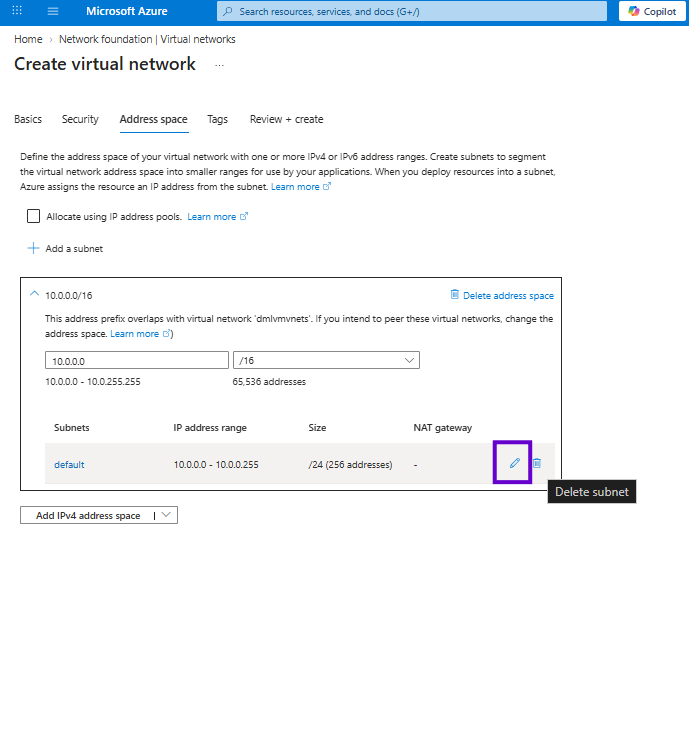
Under the IP Addresses or Address Space section:
Click the Subnet edit icon
Edit the subnet name
Click Save
Then click:
Review + Create
Create
Step 3: Create a Load Balancer
The Load Balancer distributes incoming traffic across multiple VM instances.
- Search for Load Balancer
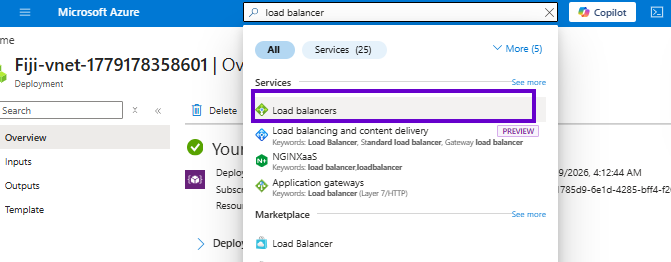
Click Create
Select Standard Load Balancer
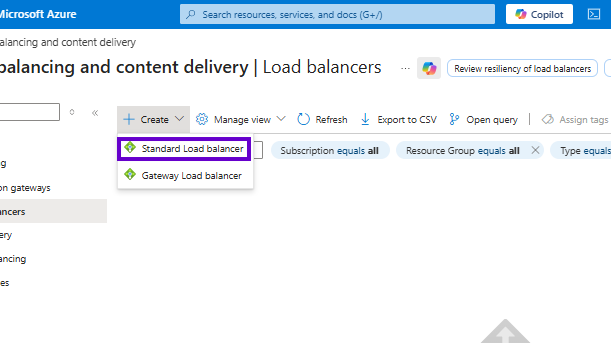
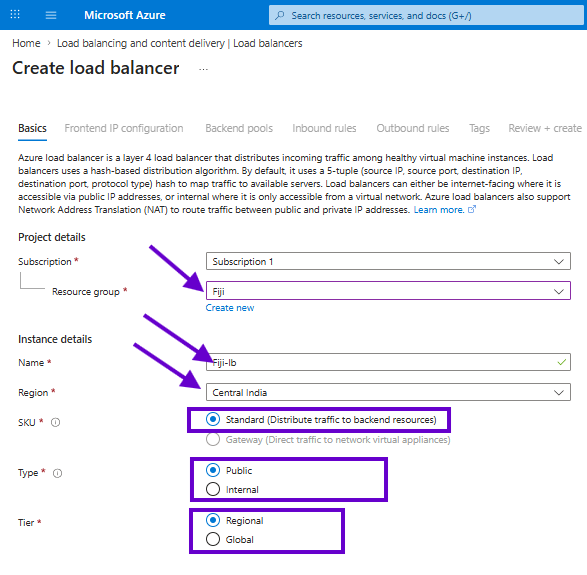
Under the Basics tab:
Select your Resource Group
Enter a Load Balancer name
Select your Region
Configure:
SKU: Standard
Type: Public
Tier: Regional
Click Next: Frontend IP Configuration
Configure Frontend IP
- Click Add a frontend IP configuration
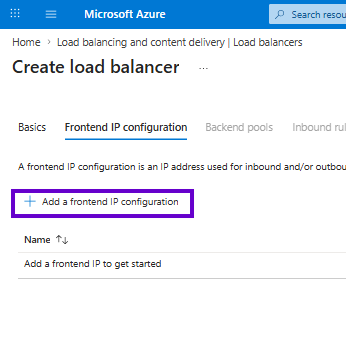
Enter a name
Under Public IP, click Create new
Enter a Public IP name
Click Save
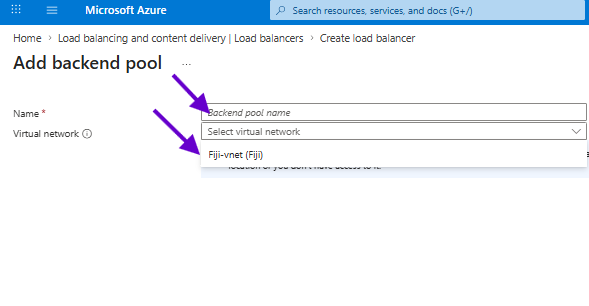
Configure Backend Pool
Go to Backend Pools
Click Add
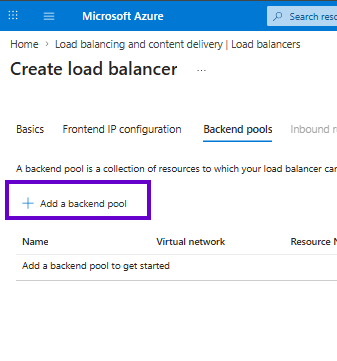
Enter a Backend Pool name
Select your Virtual Network
Click Save
Configure Load Balancing Rule
- Go to Inbound Rules
- Click Add Load Balancing Rule
Configure:
Rule name
Frontend IP address
Backend Pool
Protocol: TCP
Port: 80
Backend Port: 80
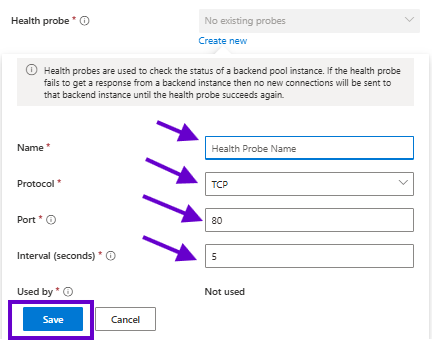
Configure Health Probe
Under Health Probe:
Click Create New
Enter a name
Configure:
Protocol
Port
Interval
Click Save
Finally, click:
Review + Create
Create
Step 4: Create the Virtual Machine Scale Set (VMSS)
- Search for Virtual Machine Scale Set
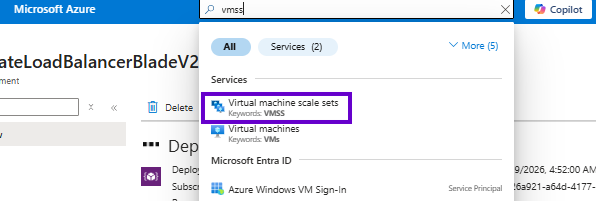
- Click Create
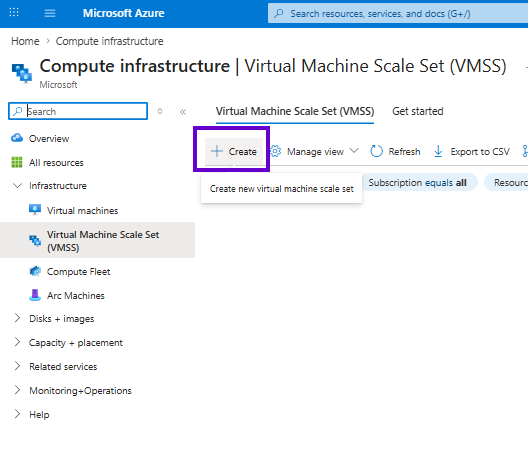
Basics Tab
Configure the following:
Resource Group
VMSS name
Region
Availability Zone
Image: Ubuntu Server
VM Size
Under Orchestration Mode, select:
- Flexible
Flexible orchestration allows Azure to scale using different VM sizes based on workload demand.
Enter:
Username
Password
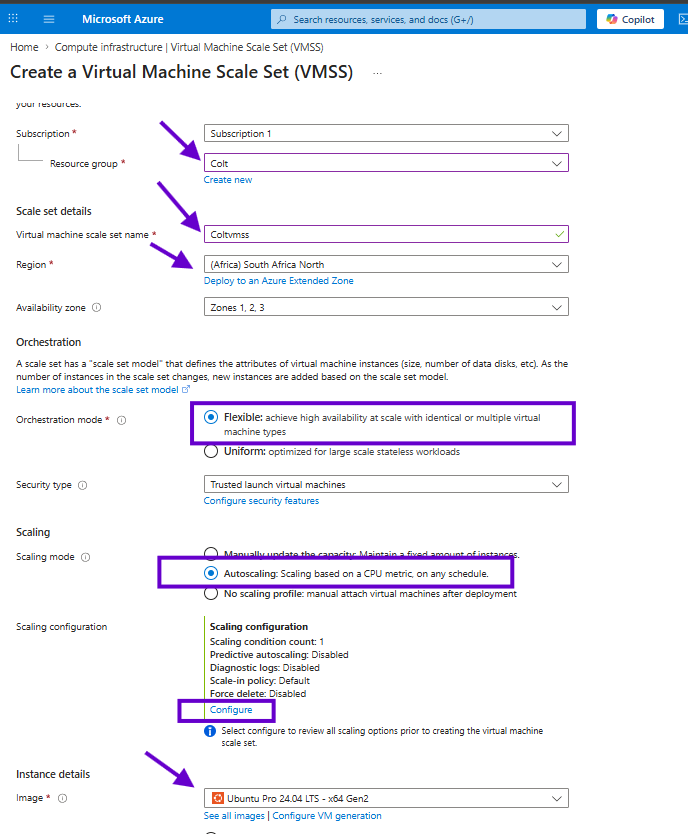
Configure Autoscaling
If Autoscaling is unavailable, the Microsoft.Insights resource provider may not be registered.
Register Microsoft.Insights
Go to the Azure Portal
Search for Subscriptions
Select your subscription
Click Resource Providers
Search for Microsoft.Insights
Click the 3-dot menu
Click Register
Wait a few minutes for registration to complete
Refresh the VMSS page
Configure Scaling Rules
Under Scaling Mode:
Select Autoscaling
Click the Configure default condition edit icon
Configure:
Default instance count
Minimum instance count
Maximum instance count
Scale-out CPU threshold
Scale-in CPU threshold
Increase instance count by
Decrease instance count by
Query duration
Click Save
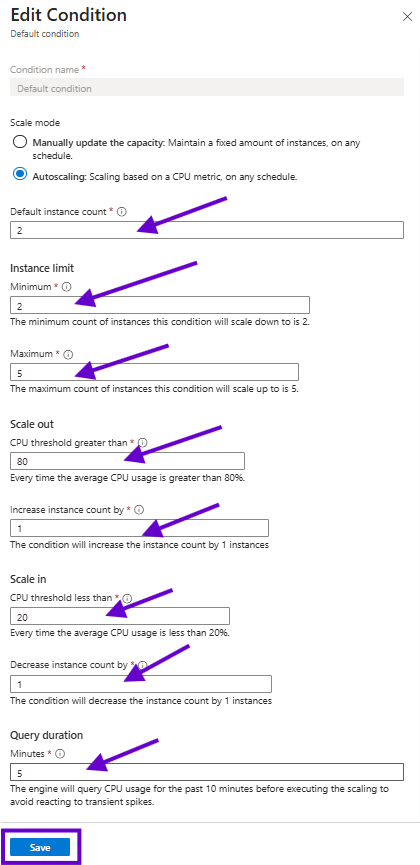
Configure Networking
Under the Networking tab:
Select your Virtual Network
Select your Subnet
Under Load Balancing:
Select the previously created Load Balancer
Select the Backend Pool
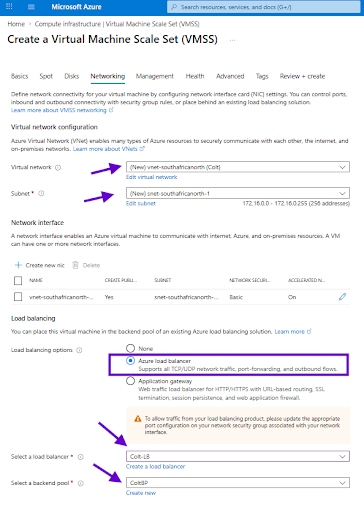
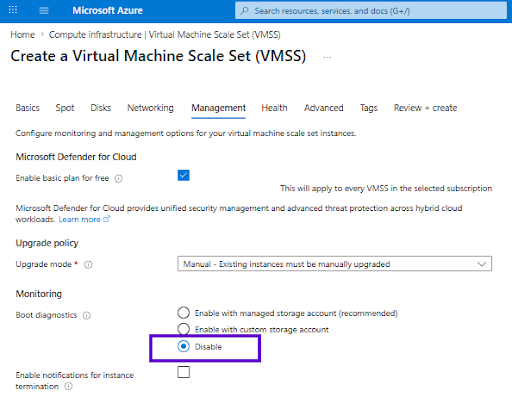
Disable Boot Diagnostics
Under the Management tab:
- Set Boot Diagnostics to Disable
Add Apache2 Installation Script
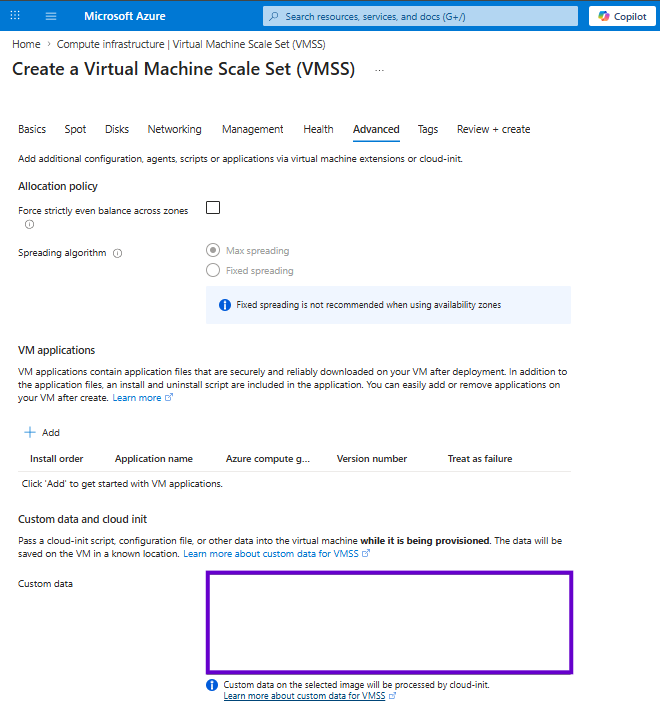
Under the Advanced tab, paste the following script into Custom Data:
#!/bin/bash
sudo apt-get update -y
sudo apt-get install apache2 -y
sudo systemctl enable apache2
sudo systemctl start apache2

HOSTNAME=$(hostname)

cat <<EOF | sudo tee /var/www/html/index.html
<html>
<head>
<title>Azure VMSS</title>
</head>
<body>
<h1>Hello from $HOSTNAME</h1>
<p>Azure VMSS Instance</p>
</body>
</html>
EOF
sudo systemctl restart apache2
This script automatically:
Installs Apache2
Starts the Apache web server
Creates a custom webpage displaying the VM hostname
Click:
Review + Create
Create
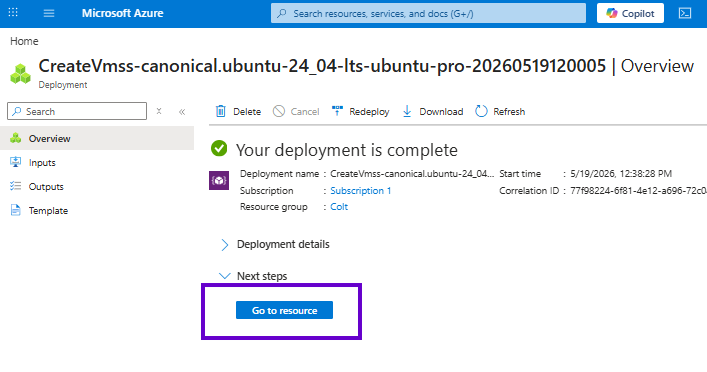
After deployment completes, click Go to Resource.
View VM Instances
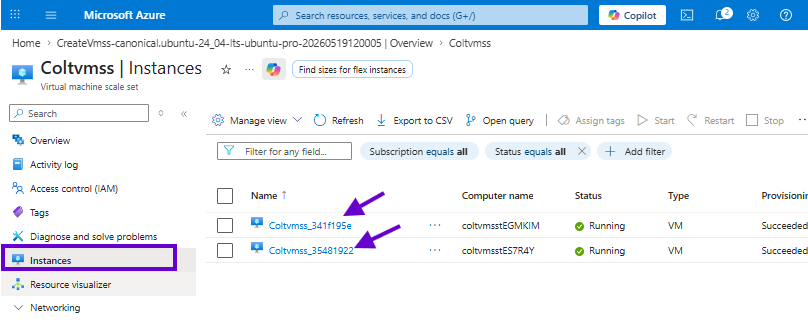
To view the created virtual machines:
Open the VMSS resource
Click Instances from the left menu
You will see all VM instances created within the scale set.
Get the Load Balancer Public IP
Open the created Load Balancer
Under Settings, click Frontend IP Configuration
Copy the Public IP Address
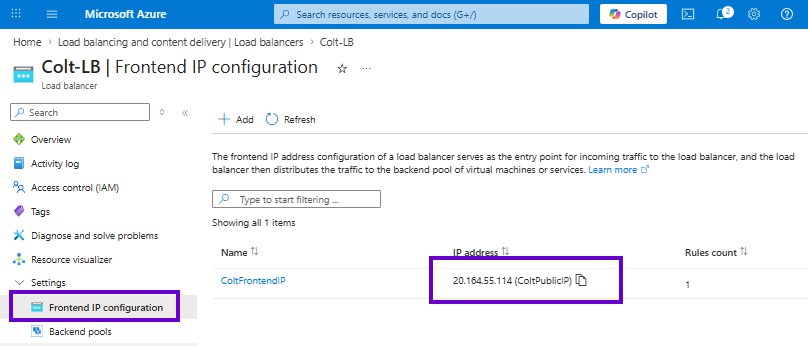
Example:
http://20.xxx.xxx.xxx
Paste the IP address into your browser.
Step 5: Configure NSG to Allow HTTP Traffic
Your website may still be inaccessible because inbound HTTP traffic is blocked by default.
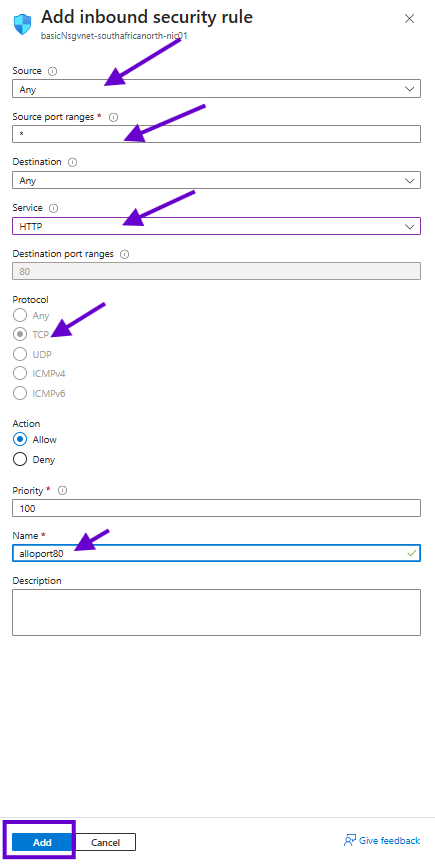
Allow Port 80
- Search for Network Security Group
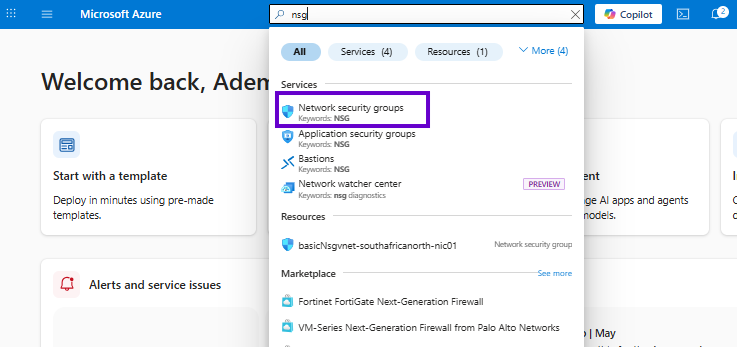
- Open the NSG attached to the VMSS
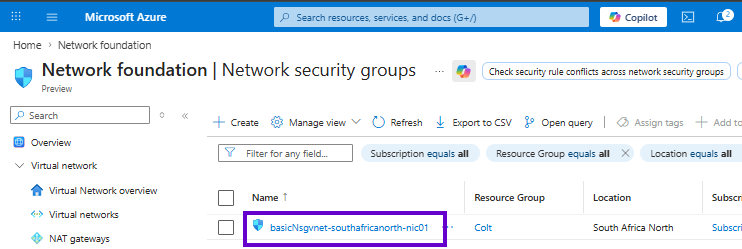
Go to:
Inbound Security Rules
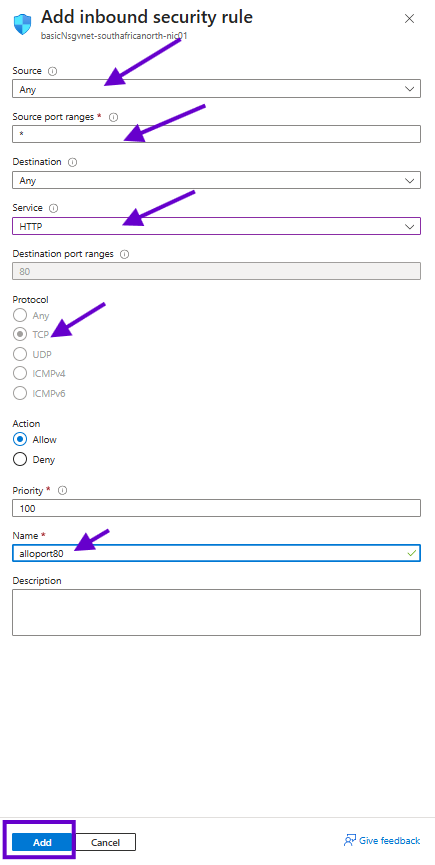
Click Add
Configure:
Source: Any
Source Port Range:
*Service: HTTP
Action: Allow
Name:
AllowPort80
Click Add
Test the Deployment
Open the Load Balancer Public IP in your browser:
http://<public-ip>
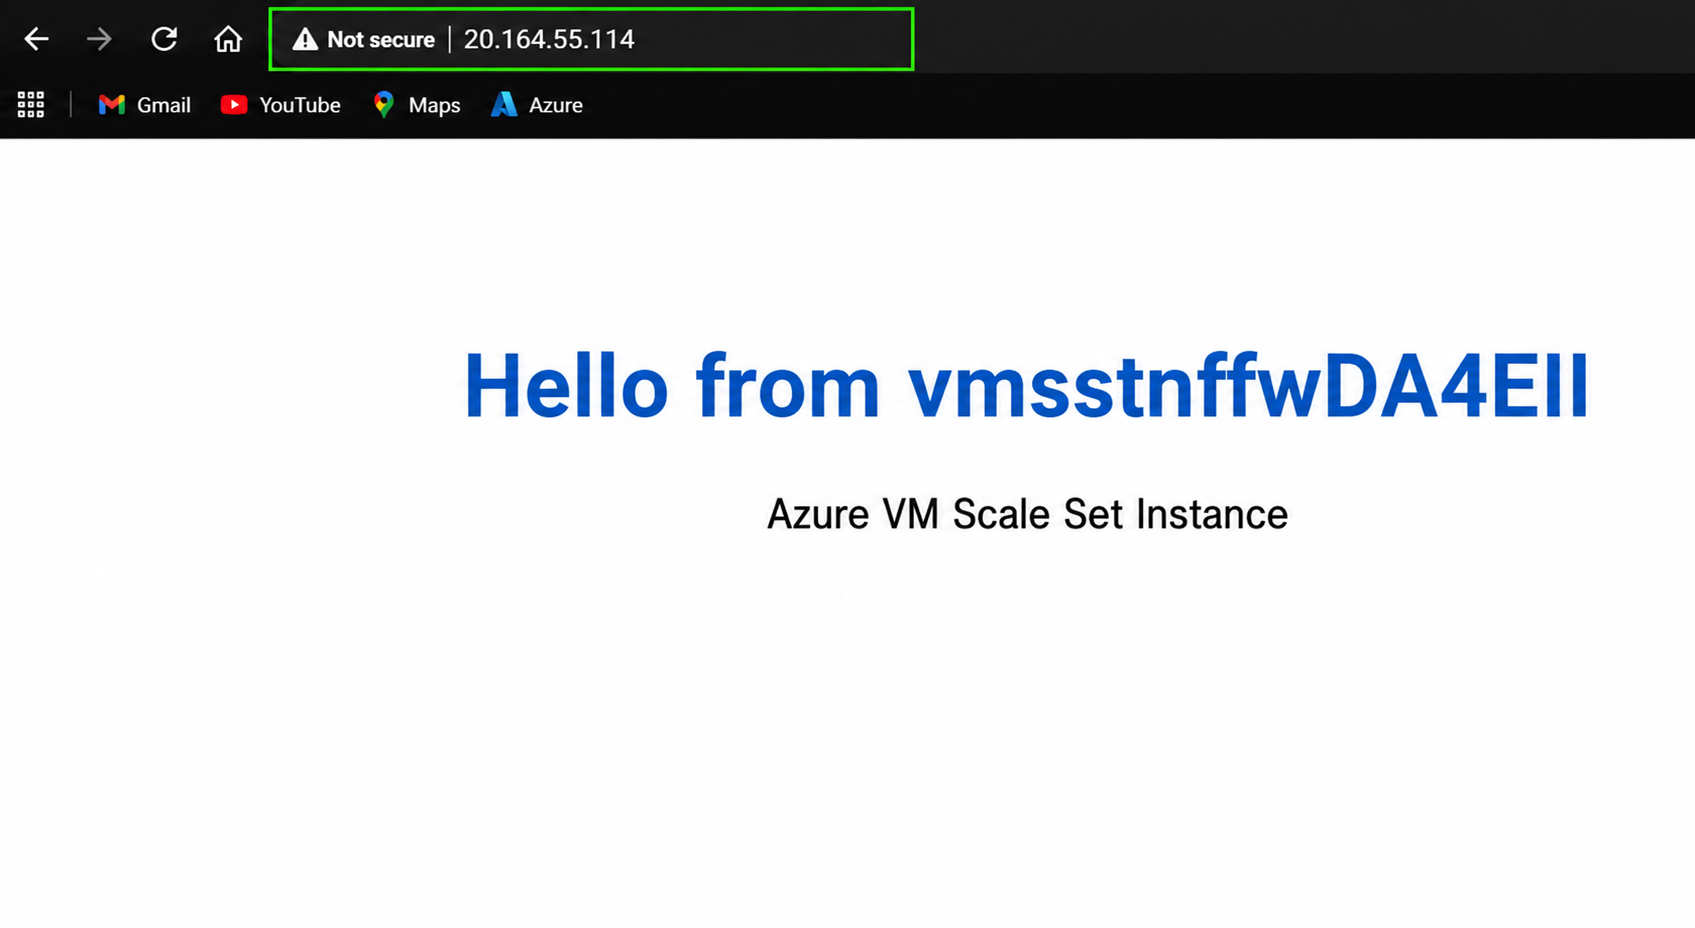
You should see:
Hello from vm-name
Azure VMSS Instance
Refresh the page multiple times.
You will notice the VM hostname changes, confirming that the Load Balancer is distributing traffic across multiple VM instances.
Conclusion
You have successfully:
Created an Azure VM Scale Set (VMSS)
Configured Autoscaling
Installed Apache2 automatically using Custom Data
Configured a Public Load Balancer
Allowed HTTP traffic through an NSG
Verified traffic distribution across VM instances
You now have a basic scalable web server infrastructure running on Azure.